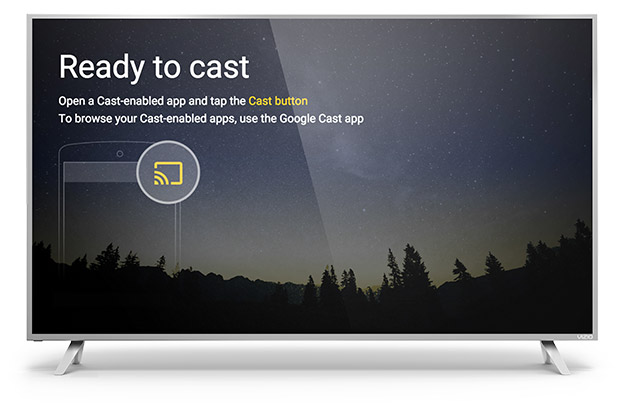
If you’re looking for a way to let participants share their screens on Zoom, there are a few different methods you can use.
The first is to allow them to share their screen from the Share Screen button at the bottom of their zoom window. You can also go into your Settings and enable the Allow Shared Screen option under Advanced Sharing Features.
Finally, you can use the keyboard shortcut Shift + Command + S (Mac) or Shift + Ctrl + S (PC) to start sharing your screen.
- In a Zoom meeting, click Share Screen in the toolbar at the bottom of the window
- Select Advanced Sharing Options and choose one of the following: – To let any participant share their screen, select Allow Any Participant to Share Screen
- – To only allow hosts to share their screen, select Only Host Can Share Screen
- Click Apply
How Do I Let Participants Share Their Screens on Zoom?
Zoom offers a few options for screen sharing: Share Computer Screens, Share iPhone/iPad Screen, and Share Whiteboards. The first two options are available to all users, while the last one is only available to Pro and Business account holders. Here’s how to use each option:
Share Computer Screen: This option allows you to share your entire computer screen with the participants. To do this, click on the Share Screen button at the bottom of your Zoom window. A new window will pop up asking you which screen you want to share.
Select the appropriate option and click Share. Your screen will now be shared with the participants. Share iPhone/iPad Screen: If you’re using an iPhone or iPad, you can share your device’s screen by clicking on the Share Device button at the bottom of your Zoom window.
A new window will pop up asking for permission to access your device’s camera roll. Once you’ve granted permission, your device’s screen will be shared with the participants. Share Whiteboard:
This option allows you to share a blank whiteboard with the participants so that they can collaborate on it in real-time.
To do this, click on the Share Whiteboard button at the bottom of your Zoom window. A new window will pop up asking whether you want to create a new whiteboard or use an existing one.
A New Window Will Pop Up Asking You to Select Which Screen You Would Like to Share
When you are on a video call on Skype, there may be times when you want to share your screen with the other person or persons that you are talking to. Luckily, Skype makes it easy to do this. In this article, we will show you how to share your screen on Skype.
To start, make sure that you are on a video call with the person or people that you want to share your screen with. Then, click on the “…” icon at the top of the call window and select “Share Screen” from the menu. A new window will pop up asking you to select which screen you would like to share.
If you have multiple monitors connected to your computer, you can choose which one to share by clicking on the drop-down menu next to “Share”. If not, then just leave “Share” selected and click “Share Screen”. The other person or people on your call will now be able to see whatever is on your screen.
To stop sharing your screen, just click on the “…” icon again and select “Stop Sharing Screen” from the menu.
Choose “Share Computer Sound” And Then Click “Share Screen
If you’re using Skype to conduct a business meeting, you may want to share your computer’s audio so that everyone on the call can hear any sounds playing from your computer. To d
o this, simply click the “Share Computer Sound” button during your Skype call. This will share any and all sounds coming from your computer with everyone on the call, including anything playing through your speakers or headphones.
Be aware that this also means they’ll be able to hear any notifications or alerts that come through as well, so it’s best to disable those before sharing your computer’s sound.
As a result of the COVID-19 pandemic, many schools and educational institutions have had to close their doors and move to online learning. This has been a big adjustment for everyone involved, and there are still some kinks that need to be worked out. However, there are also some major benefits to online learning that we didn’t realize before.
Here are just a few:
- Online learning is more flexible than traditional learning. This is probably the biggest benefit of online learning. Students can log in and learn at any time of day or night that works for them. They don’t have to worry about being in a specific place at a specific time. This flexibility is great for students who work or have other commitments outside of school.
- It’s easier to get help with online learning. If a student is struggling with understanding something, they can reach out to their teacher or classmates easily via email or chat applications like Google Hangouts or Slack. In traditional classrooms, it can be harder to get one-on-one help from teachers during class time, so this is a big advantage of online learning.
- There are more resources available online. When students are stuck on something, they can turn to the internet for help instead of just their textbook or teacher’s notes. There are millions of websites, videos, and articles available on almost any topic you can think of—and if you can’t find what you’re looking for, chances are someone else has already asked the same question (and gotten an answer) on a forum or Q&A site like Quora. So whatever question you have, chances are good that you’ll be able to find an answer online quickly and easily.
- Students can learn at their own pace with online courses. One size does not fit all when it comes to education, every student learns differently, so being able to tailor each lesson specifically for them is extremely beneficial. If students want to spend more time on certain topics, they can do so without feeling pressure from classmates or teachers.
How to Allow Others to Share Screen on Zoom on Phone?
Assuming you would like a blog post about how to allow others to share their screen on Zoom while using a phone: “How to Allow Others to Share Screen on Zoom on Phone” Have you ever been in a meeting where someone wants to share their screen, but they’re struggling because they’re on their phone?
Here’s a step-by-step guide on how to allow others to share their screen while using Zoom on their phone.
- Make sure that you have the latest version of the Zoom app installed on your phone. You can check this by going into the App Store (for iPhone users) or Google Play Store (for Android users) and seeing if there is an update available for the app.
- Open the Zoom app and sign in with your account information.
- Once you’re signed in, tap on the “Meetings” tab at the bottom of the screen. This will show you a list of all of your upcoming meetings.
- Tap on the meeting that you want to join and then tap “Join.”
- You will be given some options before joining the meeting, such as whether or not you want to use your video and audio or just listen in through audio only. Choose whatever option you prefer and then tap “Join Meeting.”
- When you’re in the meeting, look for the “Share Screen” icon near the bottom of your screen (it looks like two rectangles with an arrow between them). Tap on this icon and then select “Share Content.”
Conclusion
Zoom is a powerful tool for collaborative work, and one of its most useful features is the ability to share your screen with other participants. This can be handy when you need to show a document or website to others, or if you’re giving a presentation. Here’s how to let participants share their screen on Zoom:
- In the main Zoom window, click the Share Screen button.
- In the Share Screen pop-up window, select the option to “Share Computer Sound.” This will ensure that everyone can hear any audio that plays as part of your shared content.
- Next, choose whether you want to share your entire screen or just a specific application window. If you select “Application Window,” another pop-up will appear asking you to choose which window you want to share.
- Once you’ve made your selections, click “Share.”
Your participants should now be able to see whatever is on your screen. To stop sharing your screen, click the Stop Share button in the bottom toolbar.